
Encouraged by your lovely comments I wanted to show you some of my progress on the roombox today. :)

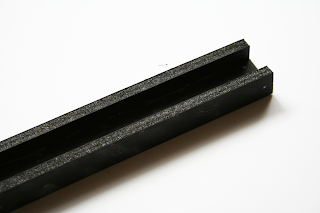
I found a plastic bar (how do you call it?) with a 2 mm wide slot, and thought I could make the bottom half of the window slide over the upper part, by slotting both in the plastic trim. Above you can see the first design.




 |
| Source: www.thefashionmedley.com |
My idea for the space was to have the large industrial windows, and overall downtown loft feel to the place. I originally wanted to get the windows lasercut, and had already finished the design to get it done at a commercial lasercutter in Rotterdam. However, being a student I am always on a budget, and in the end I decided I could do it myself.

I found a plastic bar (how do you call it?) with a 2 mm wide slot, and thought I could make the bottom half of the window slide over the upper part, by slotting both in the plastic trim. Above you can see the first design.

I started with the small window and cut all the strips from my trusty thick cardstock. First I glued them on with tacky glue on thin clear plastic, but this didnt work. The tacky wouldnt hold on the smooth plastic. I later redid it with contact glue.
I wasn't completely happy with the result, so for the large window I cut squares from a single piece of cardstock, and glued it to the clear plastic as a whole. It took a while, but with better results.
I wasn't completely happy with the result, so for the large window I cut squares from a single piece of cardstock, and glued it to the clear plastic as a whole. It took a while, but with better results.


Stupid me, I did not take into account the extra depth the plastic backing would give the windows, so when I finally slotted the windows in the plastic trims, my vision of the sliding window kinda fell apart. But it still slides! It just needs a lot of encouragement. ;)


For some extra industrial feel, I wanted some steel beams on the ceiling, like you see in a lot of modern industrial interiors nowadays. So I made some from black foamboard, which I gave a sort of rusty steelwool finish with a sharpie and a paper towel.


While I had easy access I screwed the curtain rod in the wall with this tiny phone screwdriver I stole from my dad.

Last but not least I sew some curtains from cloth handkerchiefs, as per advice from the amazing blog http://fabulouslysmall.blogspot.nl/. I ironed the tiny seams with a hair straightener.

And this is the end result. I added the upright beam because the ceiling was sagging.
I am quite happy with how it looks now. The shell is done, now for the interior!
I hope you enjoyed this update, see you in the next post,
~Rebecca
- 14:54
- 9 Comments


