Windows and curtains
14:54Encouraged by your lovely comments I wanted to show you some of my progress on the roombox today. :)
 |
| Source: www.thefashionmedley.com |
My idea for the space was to have the large industrial windows, and overall downtown loft feel to the place. I originally wanted to get the windows lasercut, and had already finished the design to get it done at a commercial lasercutter in Rotterdam. However, being a student I am always on a budget, and in the end I decided I could do it myself.

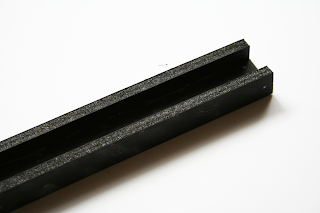
I found a plastic bar (how do you call it?) with a 2 mm wide slot, and thought I could make the bottom half of the window slide over the upper part, by slotting both in the plastic trim. Above you can see the first design.
I started with the small window and cut all the strips from my trusty thick cardstock. First I glued them on with tacky glue on thin clear plastic, but this didnt work. The tacky wouldnt hold on the smooth plastic. I later redid it with contact glue.
I wasn't completely happy with the result, so for the large window I cut squares from a single piece of cardstock, and glued it to the clear plastic as a whole. It took a while, but with better results.
I wasn't completely happy with the result, so for the large window I cut squares from a single piece of cardstock, and glued it to the clear plastic as a whole. It took a while, but with better results.

Stupid me, I did not take into account the extra depth the plastic backing would give the windows, so when I finally slotted the windows in the plastic trims, my vision of the sliding window kinda fell apart. But it still slides! It just needs a lot of encouragement. ;)
For some extra industrial feel, I wanted some steel beams on the ceiling, like you see in a lot of modern industrial interiors nowadays. So I made some from black foamboard, which I gave a sort of rusty steelwool finish with a sharpie and a paper towel.
While I had easy access I screwed the curtain rod in the wall with this tiny phone screwdriver I stole from my dad.
Last but not least I sew some curtains from cloth handkerchiefs, as per advice from the amazing blog http://fabulouslysmall.blogspot.nl/. I ironed the tiny seams with a hair straightener.
And this is the end result. I added the upright beam because the ceiling was sagging.
I am quite happy with how it looks now. The shell is done, now for the interior!
I hope you enjoyed this update, see you in the next post,
~Rebecca


9 reacties
Genius to use a hair iron to iron the tiny curtains with - great job!
BeantwoordenVerwijderenI must confess I saw it as a tip somewhere on a blog, but cannot for the life of me remember where. That's the problem with all these great miniature blogs and all these great tips. I forget where I saw what, haha! Thank you!
VerwijderenCool idea to use a sharpie for the steel beams, which look really nice in the box. Good thinking for the windows as well, it's true that lasercuts cost sooo much. Previously I made an order on snijlab for a big project with a lot of little pieces (for which I was too lazy to cut them myself) and the results were really amazing, but as you mention, to a certain price...
BeantwoordenVerwijderenI would still love to order something from Snijlab, but maybe something smaller to begin with. The design for the windows involved so many cuts that the price came out a little too high for my liking. I still have plenty ideas that would be so much better if a machine did the cutting, instead of my hands, so maybe in the future. :)
VerwijderenIt all looks very nice :)
BeantwoordenVerwijderenLooks great!
BeantwoordenVerwijderenDat heb je slim en netjes gedaan en haha, dat herken ik hoor, dat je dingen vergeet mee te nemen en dan werkt het effe net anders dan je voor ogen had. Altijd beetje jammer, maar we leren er wel van zullen we maar zeggen ;). Wat leuk dat je mijn tip hebt kunnen gebruiken hiervoor, het is goedkoper en makkelijker aan te komen dan gewoon dunne stoffen waar je ook meteen grote lappen van moet kopen/bestellen (al kan dat vaak per halve meter, dan nog halve meter bij 1,40m) en dank voor het compliment! :D Ik zie trouwens dat de vloer al minder krom is dan eerder inderdaad, beter!
BeantwoordenVerwijderenDankjewel! Ik heb alle schoonheidsfoutjes en lijmresten maar voor lief genomen, onder het mom van 'oude industriële ramen hebben ook imperfecties'. En uiteindelijk werkt het nu ook, ik hoef nu geen ophangsysteem te bedenken, het raam blijft vanzelf openstaan haha. En de tip was fantastisch, ik was toevallig ook naar een stoffenwinkel gegaan, maar daar was ik zoveel duurder uit geweest voor meer overbodige stof! Het vloerprobleem lost zichzelf langzaam maar zeker op, ooit heb ik een echt platte vloer.
VerwijderenThe beams look great!
BeantwoordenVerwijderen